Combine multiple table images into one Excel sheet
Add the images to Image to Excel, check each table and choose Combine into one sheet when you download. Rows are appended in image order. You can also put each image on its own sheet.
Choose your table imagesExample: two sales tables, one spreadsheet
These fictional example tables have the same column headings. Coffee mug appears in both months: the combined file keeps both records. It does not add their quantities together.
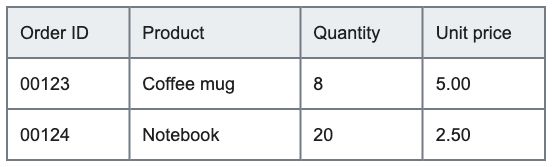
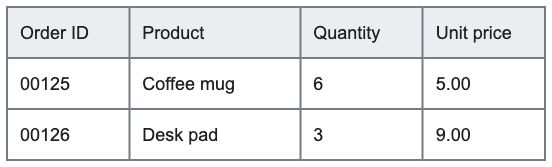
Download the Excel generated from these two images. The optional source columns show the image name and original row. Review the downloadable examples before using them as a template.
| Order ID | Product | Quantity | Unit price | Source image | Source row |
|---|---|---|---|---|---|
| 00123 | Coffee mug | 8 | 5 | january-sales.jpg | 2 |
| 00124 | Notebook | 20 | 2.5 | january-sales.jpg | 3 |
| 00125 | Coffee mug | 6 | 5 | february-sales.jpg | 2 |
| 00126 | Desk pad | 3 | 9 | february-sales.jpg | 3 |
How to combine your images
- Open the converter and choose your JPG or PNG files. Up to 10 images per batch, 10 MB each and 30 MB in total.
- Use the image tabs to compare every result with its original. Edit cells where needed and check important numbers, decimal points and column alignment.
- Keep First row is a header selected if each image starts with column headings. To combine tables, their headings and column order must match.
- In Export options, choose Combine into one sheet. Select Include source image and row if you need to trace records.
- Click Download Excel. The original image files remain unchanged.
What you see after adding images
Each image tab shows that image beside its editable table. Check one image at a time, then use Export options to choose the workbook layout and Download Excel to export it.
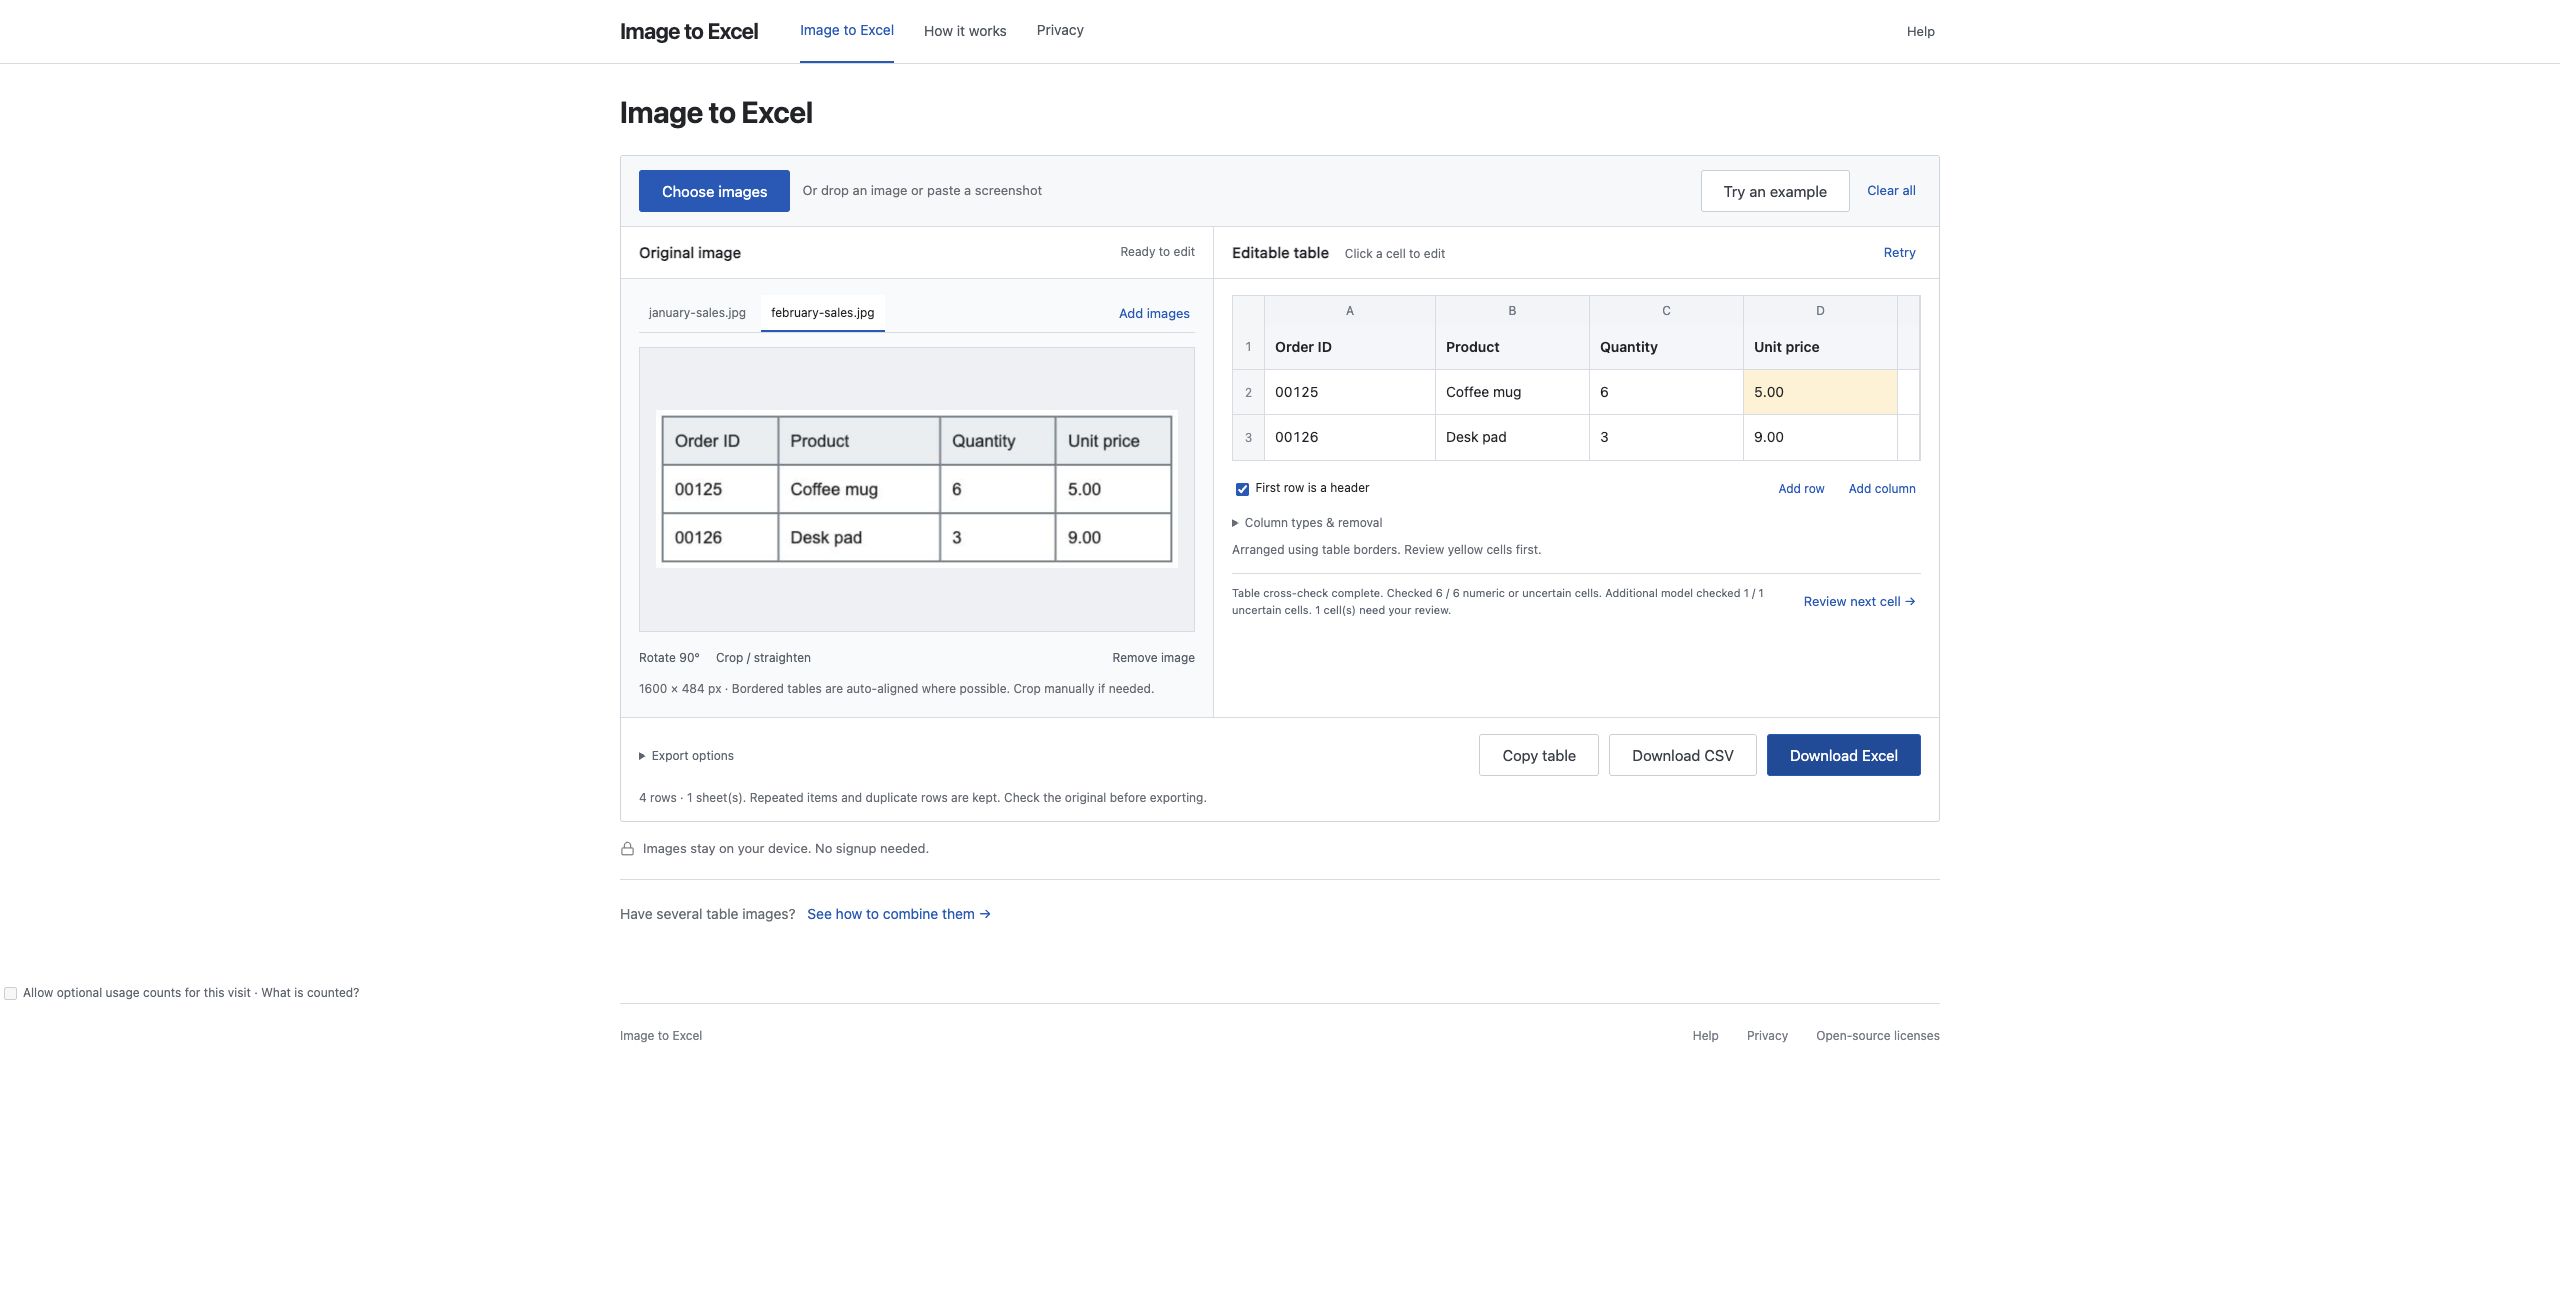
Open the full-size screenshot · Open the converter to try your own images.
One sheet or a separate sheet for each image?
Use one combined sheet for matching lists such as monthly sales records. Choose One sheet per image for unrelated tables or tables with different headings. Combined mode keeps repeated items and duplicate rows; it does not deduplicate, group products or calculate totals.
Check order IDs before and after export
- Compare IDs with the image. If it shows 00123 but the editable cell reads 123, correct the cell. Do not guess missing zeros.
- For each image, open Column types & removal and choose Keep as text for its ID column. This setting does not repair OCR.
- Choose Download Excel (XLSX), reopen the workbook and check the IDs again.
Download CSV and Copy table do not store cell types; Excel may convert IDs when opening or pasting. For CSV, re-import the original file that still contains the zeros through Data → From Text/CSV, setting the ID column to Text before loading; follow Microsoft's instructions. Changing format cannot restore zeros already lost. Yellow and unmarked cells both need checking.
Which inputs are supported?
Clear screenshots of simple tables with printed English text and numbers work best. Handwriting, receipts, complex nested headings and other languages are outside the current supported scope. Take a new picture if text is blurred, cropped or covered by glare. Your image content is processed on your device.
Convert your table screenshots to Excel →
Example data, not customer records. Both input images and every exported cell were checked for this example. Always review your own results.